[Deze sectie is nog niet vertaald.]
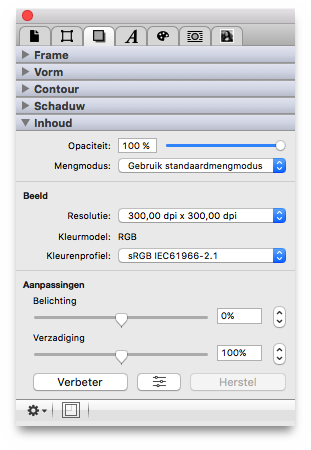
Each image has an adjustable opacity from 0% to 100%. Adjust it by entering the desired numeric value or move the slider with the mouse.
Here you can define how the image frame will be blended with
the background. Mengmodus is described in detail at the end of the
Inspectors
chapter.
[Deze sectie is nog niet vertaald.]
The following parameters refer to the image content itself.
Here you can see the current resolution of the image in the selected frame. The resolution is measured in dpi (dots per inch). For high-quality prints, images should be scaled to 300dpi at least. Lower or higher resolutions may be suitable, depending on the purpose of the image.
When image resolutions are below 150dpi, they are shown in red.
Image resolutions from 150 to below 300dpi are shown in orange. 300dpi
and above are shown in normal
black text.
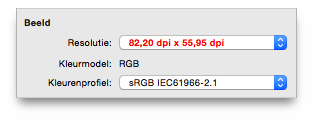
You can see the current image resolution here, and you can even select a common image resolution after a click on the pop-up menu. The image will then be scaled immediately.
[Deze sectie is nog niet vertaald.]
Here you see the detected color model of the image. Read more
about color models in the Edit color
chapter of the Color
inspector.
[Deze sectie is nog niet vertaald.]
Here you see the detected or currently assigned color profile for
the image. The popup menu offers a variety of color profiles,
depending on your OS X system. You can assign another color profile,
e.g. for separation purposes. An assigned color profile may change the
color representation of an image, but does not change the image data.
Merk op: If you want to use your own ICC color profiles, you have to copy them to /Library/ColorSync/Profiles/ first. They will then be available in iCalamus, too.
[Deze sectie is nog niet vertaald.]
Here you find some basale beeldfiltering-ondersteuning.
Move the slider to adjust the exposure of the image. You can also use the numeric input field or the value stepper to change the values.
Move the slider to adjust the saturation (which is the color intensity) of the image. You can also use the numeric input field or the value stepper to change the values. Zet verzadiging op 0 om de afbeelding zwart/wit te maken.
Click this button to let iCalamus automatically enhance the colors.

[Deze sectie is nog niet vertaald.]
If you click this button, the Adjust Image
window opens
where you can adjust more image parameters.
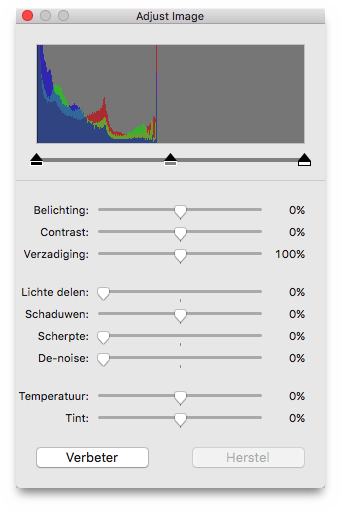
This button resets all image filters.
Click the action symbol in the bottom left corner of the Content inspector to access additional functions.
If the image in the selected frame contains transparency information, you can create an outline using this function. Then use the outline for image clipping, text wrap or other layout purposes. When you choose the function, the following dialog opens:
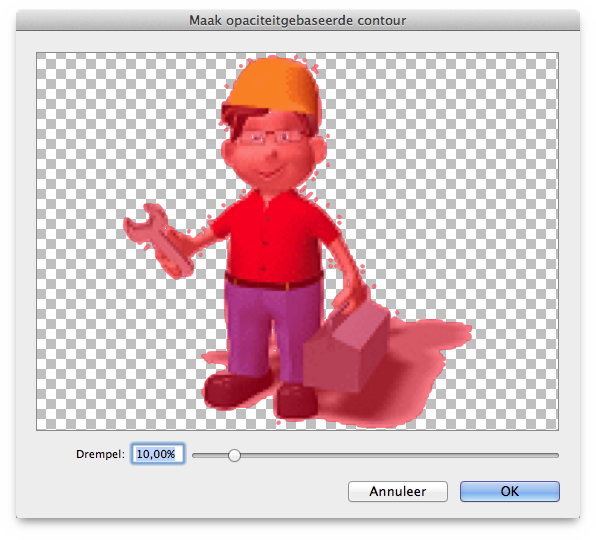
The red tinted area which is shown in the preview, is above the threshold which can be set at the bottom of the dialog. A threshold of 0% creates an outline that clips only the white parts. A threshold of 100% does not create any outline at all.

When you see the tiny frame symbol at the Content inspector bottom tinted red, it signals that the image in the frame is currently not sized to its original proportions. With a click on the symbol you can adjust the image in proportion to the current frame size. The image will be centered in the frame.
