As we have already said, iCalamus is a frame-oriented typesetting program. This is: all content which you want to use in a document has to be placed into frames. And these frames need to be created. Sometimes this is done automatically, but most of the time you will have to create these frames yourself. iCalamus cannot really guess where you want to place a frame.
If you want to create a frame, you have to select a frame Creation
tool from the Toolbox panel
first.
The Tool palette
is that small window with the blue
iCalamus
title which is placed somewhere in the left screen
area on first launch, but can be moved anywhere on the screen.
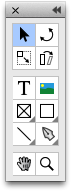
When you take a closer look to the Tool palette
, you will
recognize that the function buttons which are shown there, are
organized into three groups. The second group contains the frame
Creation tools
.

The symbols of these six Creation tools
can easily be
recognized and used.

Use the Text tool
for creating text frames. (You should
have bet, right?)

The Image tool
to the right of it creates image frames (and
also automatically starts an image import).
The following four tools are named Container tool
, "Shape
tool,
Line tool and
Vector tool. These four have a
tiny black edge in their function icon. It indicates that there are
more tools available there. When you click on one of these tools and
keep the mouse button pressed, a selection menu with more tools is
shown.
Now you have met the Creation tools, and can decide which
kind of frame you want to create first. The procedure is always the
same; it doesn't matter which Creation tool you choose.
Your first frame in an iCalamus document is done. Congratulations.
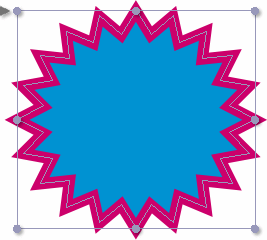
Depending on which Creation tool you have chosen, you will see a gray ruler with several black buttons above the frame (text frame), or the OS X file selector might open to let you import an image file. In container frames, you will see a gray X in the frame, which indicates that this frame is empty. In shape frames you will see the selected shape, which is a black rectangle by default. In line frames you will see – surprise! – a line.
If you have chosen the Vector tool, you might wonder about
the result. You see a frame with kind of a crooked line, and, when you
continue clicking in the document, this line gets longer and more
crazy. What happened here? The
Vector tool has created a new
frame and opened it at the same time. So you edit the content of the
vector frame when you continue clicking.
An open frame shows a dark gray triangle in its upper left
corner which points downwards. If you want to close this frame again,
simply click once on this triangle. It should then point to the right.
(Alternatively, you will find both the commands Open and
Close in the
Objects menu which do the same things.)

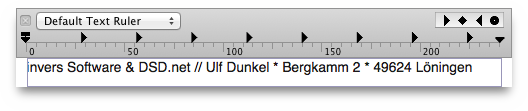
An open text frame does not show this triangle, but instead it shows the current text ruler above the frame.
Now, what did I tell you! – The more you have tried creating frames, the more frames you have spread around in your document. If you want to move frames to another position, or want to resize them, you will firstly have to change the tool!
Until now, you have got to know the Creation tools. But
these can be used only for creating new frames, and even more new
frames. If you want to select, move or resize frames, you need the
Selection tool which is placed in the upper left corner of the
Tool palette. Exactly – it's the arrow symbol.

Using the Selection tool, you open and close frames by
clicking on the tiny triangle in the upper left corner of the frame.
If you want to move a frame, simply click somewhere in the closed
frame. Thus it will be selected, and you can then see its border and
the gray grab points in the middle of the frame borders and at the
frame corners. Now you can move it by clicking it and keeping the
mouse button pressed. Move the mouse pointer – the frame will
follow your movements. The old position of the frame will still be
shown, but in lighter colors. When you release the mouse button, the
frame will be placed in its current position. Thus it is moved. Lesson
learned.
If you want to resize a frame, click one of its gray grab points which we mentioned before. Now drag the grab point in the desired direction, keeping the mouse button pressed. When you move the grab points in the middle of the the frame borders, the other borders of the frame stay in their position. By using the grab points at the frame corners, you can change the frame's size in two directions at the same time.
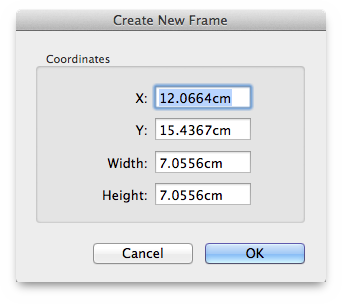
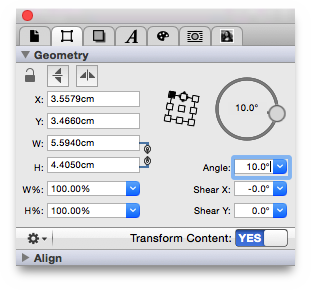
For numeric moves and resizings, please use the Geometry
inspector, which cannot be described here. You will find every
single button and switch described in detail in the reference manual
chapters.