udjævnetindhold.
Whenever you want to create a PDF from an iCalamus document, you will surely use the Print dialog from its File menu. There you find the PDF function popup menu, identical in all Mac OS X applications which use the Cocoa print output engine.
Usually you choose Save as PDF
and you're done. But sometimes you need a PDF-X file, e.g. when a print services requests a more secure PDF file format. PDF-X is a standard which removes many newer enhancements from PDF files, making them usable in a wider range of even older PDF processors. One of the most popular features in newer PDF files is transparency, plus several native PDF blend modes.
(Read more about Blend Modes
in the iCalamus manual.)
When you use blend modes in an iCalamus document and create a PDF-X file from this document, you will be surprised about the low resolution of the resulting PDF.
Save As PDFand ask the print shop to do the
flattening. But if you need to do the reduction yourself for whatever reason, you should check the created PDF first in Preview and/or in Adobe Reader. Errors due to transparency reduction by Mac OS routines can be seen there very simple in most cases.
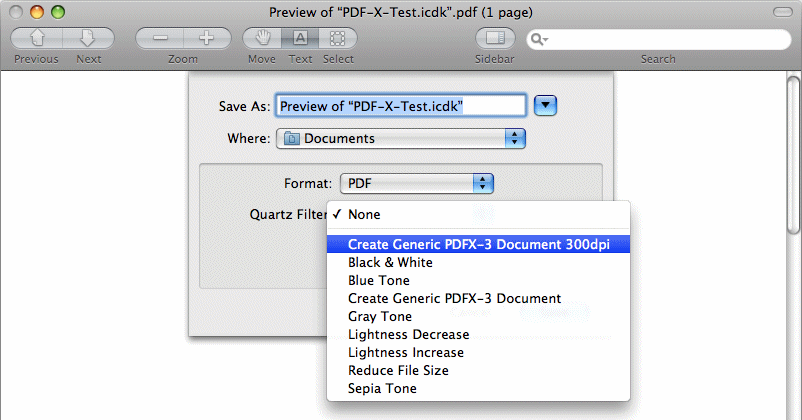
When you use the PDF option Save As PDF-X
from any Print dialog (not only in iCalamus!), the PDF output engine uses a generic Automator workflow to convert the document content into a PDF-X document. This Automator workflow is named Apply Quartz Filter to PDF Documents
. It uses a Quartz filter called Create Generic PDFX-3 Document
. But this filter has been predefined by Apple to flatten transparencies to only 72dpi, which is unusable in high-quality print production workflows!
With Automator, you can create as many workflows as you like to, using and combining many available filters, variables and scripts. But the workflow which is used here, uses a non-editable Quartz filter (/System/Library/Create Generic PDFX-3 Document.qfilter). Instead, you can duplicate this original Quartz filter and change the parameters of its duplicate.
1
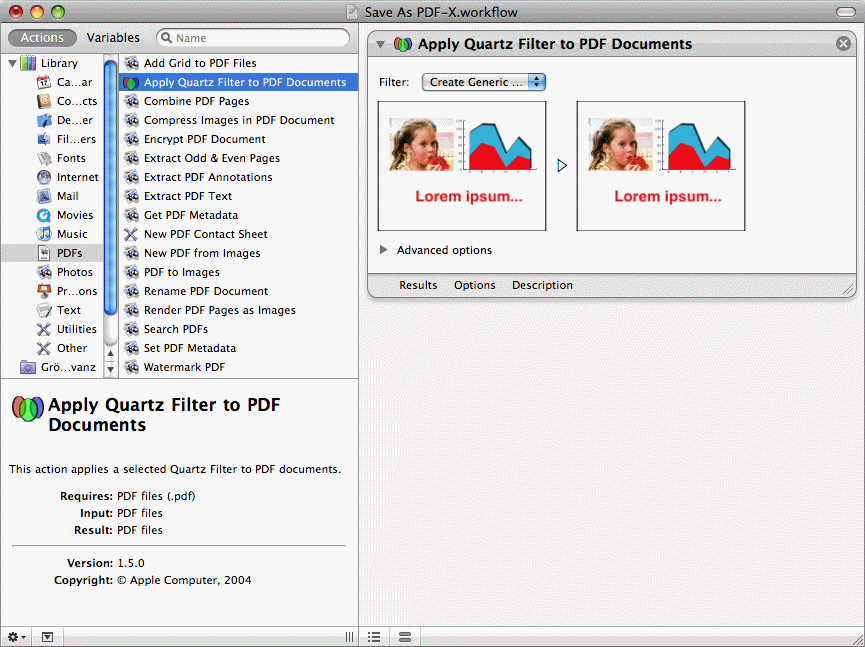
It's usual place is /Library/PDF Services/Save As PDF-X.workflow. Double-click it to open it in Automator.
2
Here you see the loaded Automator workflow. The upper left area of the window shows a library of available workflow actions etc. The lower left area shows a description of the currently selected action. A list of workflow actions can be created and edited in the right area of the window. In this case, the workflow only uses one action, Apply Quartz Filter to PDF Documents
.
3
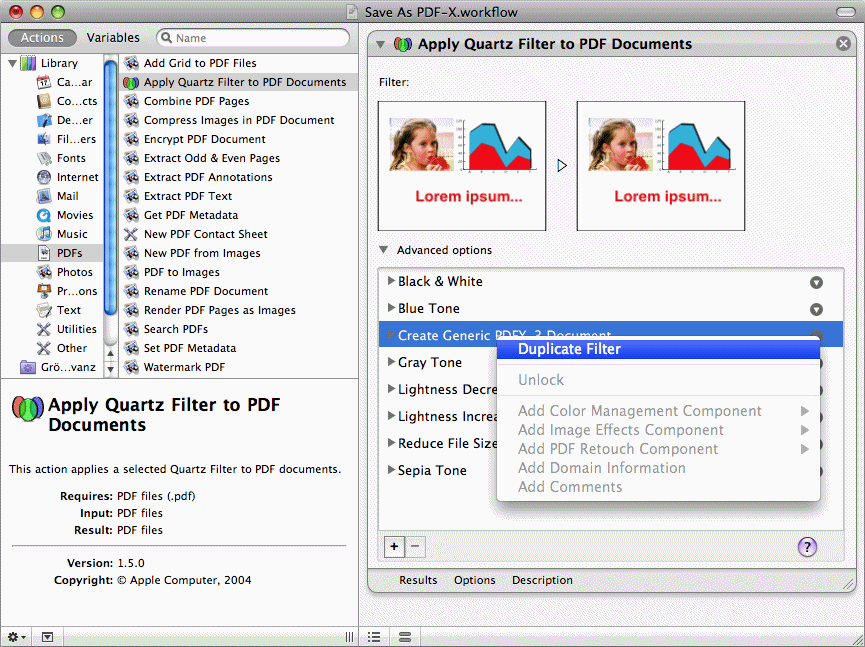
Open the Advanced options
section and select the filter Create Generic PDFX-3 Document
. Then click on the tiny triangle right to the filter name. Choose Duplicate Filter
from the function menu.
4
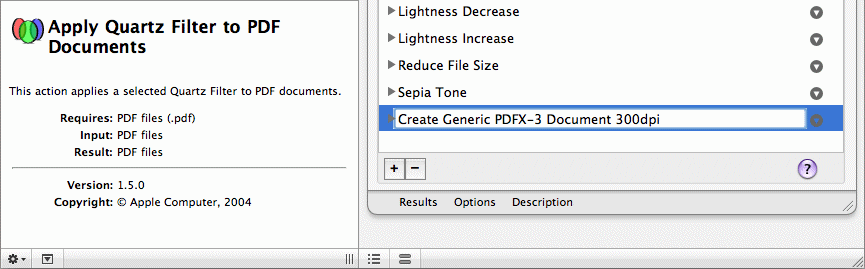
Now you have duplicated the Quartz filter which cannot be edited. But you can edit its copy. Select the copied filter. Then double-click on its name and edit it, e.g. like suggested in this snapshot.
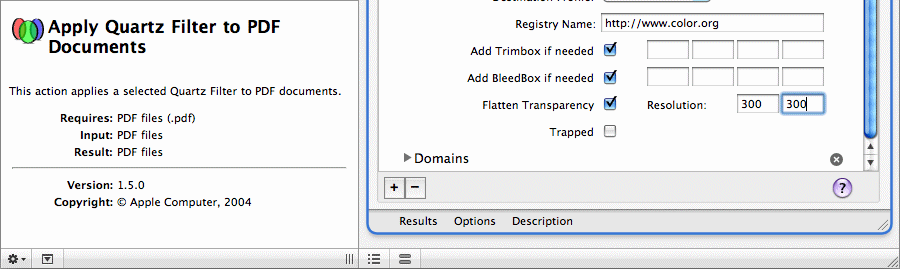
5
Open the filter parameters area. (You may have to resize the window to see all parameters. The handling of this is somewhat strange ...) Find the section Flatten Transparency
and change its values from 72 to e.g. 300 dpi. (This should be enough in most cases even with high-quality print processes. But once you're done with this tutorial, you will know how to create another filters with even higher resolutions, if required.)
Important: Do not change the parameters in the Domains
section of this copied filter. Automator might crash and loose your copied filter then.
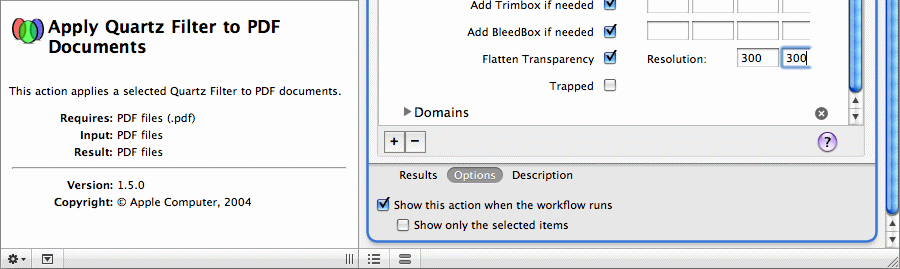
6
Below the filter parameters area, you see three selectable text fields. Click on Options
and check the option Show this action when the workflow runs
.
7
You're done. Save the workflow under its already existing file name.
Summary: You have opened an existing Automator workflow which uses a Quartz filter. Then you have duplicated the relevant filter and changed parameters in its copy. Now you can use the added new Quartz filter in other applications.
8
Now that you have prepared everything to use a repaired PDFX-3 output, you will have to know one last thing for the time remaining – until Apple fixes another bug in its PDF output engine:
Here is the trick: When you want to create a PDFX-3 file from your iCalamus document, do the following steps:
File > Printin iCalamus.
Preview!
File > Save Asin Preview.
Save.